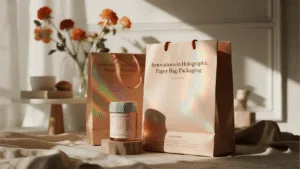
Are you losing money from products damaged during shipping? Worried that negative customer experiences are tarnishing your brand? Learn the professional methods to ensure your items arrive safely every time.
Professionally packing involves selecting the right-sized, durable box, using at least two inches of appropriate cushioning, and securely sealing it with quality tape. For shipping, choose a reliable carrier that matches your budget, speed, and tracking needs.

Following these steps is the baseline, but the real art and science come from optimizing each stage. From my decade in the packaging industry, I’ve seen countless businesses struggle with returns and damage claims, all because of small, avoidable mistakes in their packing process. The way you package and ship is a direct reflection of your brand’s commitment to quality. It is the final handshake with your customer. Let’s explore how we, as packaging professionals, approach this critical part of the business to save costs and build customer loyalty.
How Do You Choose the Right Box and Cushioning?
Are you just grabbing any old box? Worried that one-size-fits-all packaging isn’t protecting your unique products? I’ll guide you to the perfect combination for maximum safety.
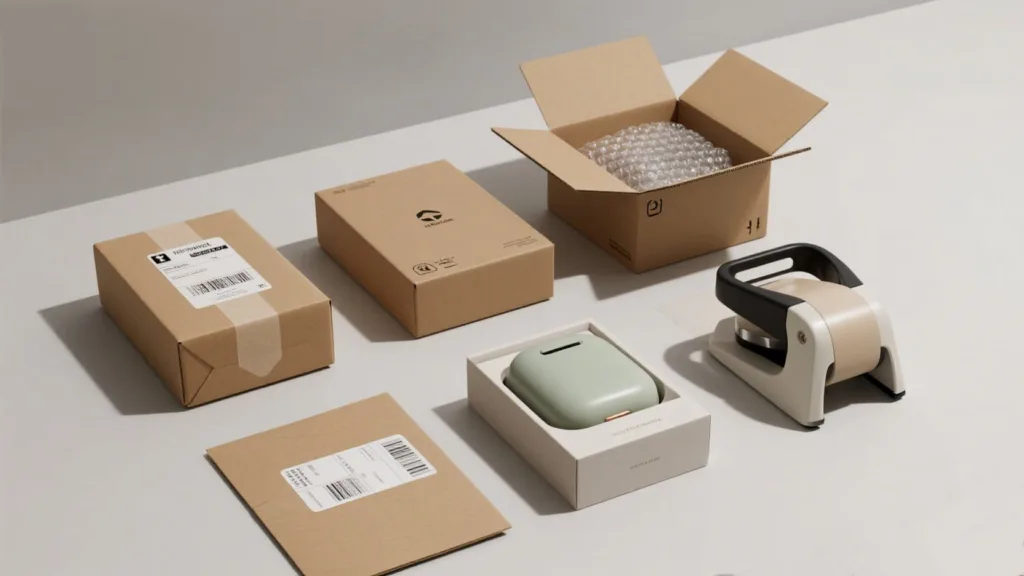
Choose a new, sturdy corrugated box slightly larger than your item. The strength, or ECT rating, should match the product’s weight. For cushioning, select a material like bubble wrap, air pillows, or custom inserts that will fill all empty space and prevent movement.

The box is your product’s first line of defense. At Omet Packaging, we always start here. For e-commerce brands, a mailer box often works well for apparel or subscription kits due to its presentable and sturdy design. For heavier or more fragile items like electronics or glass jars, a regular shipping carton with a higher ECT (Edge Crush Test) rating is essential. This rating tells you how much stacking weight the box can withstand. A common mistake is reusing old boxes; they can lose up to 50% of their structural integrity. We worked with a gourmet food company that was shipping glass jars of sauce in flimsy boxes. Breakage was a huge issue. We switched them to a custom-sized, higher-ECT box with a specific die-cut insert. This insert, made from corrugated board, held each jar perfectly in place. It not only eliminated breakage but also created a beautiful, professional unboxing experience. Their damage claims dropped to nearly zero.
| Cushioning Type | Best For | Pros | Cons |
|---|---|---|---|
| Bubble Wrap | General purpose, fragile items | Versatile, lightweight, good shock absorption | Not eco-friendly, can be bulky |
| Air Pillows | Filling empty voids in the box | Very lightweight, clean, uses less plastic | Can pop, offers less direct cushioning |
| Packing Peanuts | Filling large, irregular spaces | Lightweight, fills gaps well | Messy, static cling, often not recyclable |
| Custom Inserts | High-value or uniquely shaped products | Maximum protection, premium look, secure fit | Higher initial cost, requires design |
What’s the Best Way to Pack Items Inside the Box?
Are your products rattling around inside their package? Do customers complain about disorganized contents? Let’s look at the professional technique for packing items securely.
Wrap each item individually. Place the item in the center of the box, ensuring at least two inches of cushioning on all sides. Fill all remaining empty space completely to prevent any movement during transit. Heavier items should always go at the bottom.

How you arrange things inside the box is just as important as the box itself. The golden rule is to eliminate movement. Any empty space allows the product to shift, slide, and collide with the box walls, which is how most damage occurs. The "2-inch rule" is our standard practice. It means your product should be suspended in the middle of the box with a protective cushion of at least two inches on the bottom, top, and all four sides. For extremely fragile items, we often recommend the "box-in-a-box" method. The item is packed in a smaller box with cushioning, and then that box is placed inside a larger shipping box with more cushioning. I remember a client selling delicate ceramic mugs. Their products were beautiful, but their shipping was a nightmare. We helped them implement a simple system: wrap the mug in bubble wrap, place it inside a small custom insert we designed, and then place that into the shipping mailer. It added seconds to their packing time but saved them thousands in returns and customer service hours.
Professional Packing Steps:
- Cushion the Bottom1: Add a 2-inch layer of your chosen cushioning material at the bottom of the box.
- Wrap Items2: Wrap each item individually, especially if you are shipping multiple items in one box.
- Position and Fill: Place the item in the center. Fill the surrounding sides and the top with more cushioning until the box is completely full and nothing can move when you gently shake it.
- Add Paperwork: Place the packing slip or any thank-you notes on top before sealing.
How Do You Properly Seal and Label Your Packages?
Is your tape coming loose in transit? Are shipping labels causing delays because they can’t be scanned? Let’s secure the final, crucial steps of the process.
Use strong, 2-to-3-inch wide packing tape, not masking or cellophane tape. Apply it using the H-tape method, sealing the center seam and both edge seams. Place the shipping label on the box’s largest flat surface, making sure it is clear and unwrinkled.

Sealing the box is not the time to cut corners. A cheap tape can fail in extreme temperatures or humidity, exposing your product. We always recommend a high-quality, pressure-sensitive plastic tape or water-activated tape for our clients. The H-taping method is the industry standard. You run a strip of tape along the main center seam where the flaps meet, and then you run two more strips along the shorter edge seams. This forms a capital "H" and provides the most secure seal. When it comes to labeling, clarity is everything. The label should be flat, fully visible, and placed on the top of the box. Avoid putting it over a seam or on the side, as automated sorting machines may not be able to scan it. Make sure the barcode is crisp and clear. As a BSCI-certified company, we believe in standardized, reliable processes. Adopting these simple sealing and labeling standards in your own warehouse is a small change that prevents huge logistical headaches down the line.
Conclusion
Mastering packaging and shipping with the right box, cushioning, and sealing methods protects your products, saves money, and reinforces the quality and care of your brand.