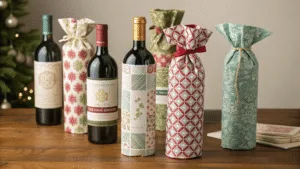
truggling with that awkward wine bottle or candle? The paper bunches up, the ends look messy, and it just doesn’t look professional. You want it to look good.
To perfectly wrap a cylinder, roll the object in pre-measured paper, secure the main seam with double-sided tape for a clean look, and then neatly fold the ends. You do this by creating a series of small, flat pleats around the circular tops.

That awkward shape can be intimidating, but the solution is simpler than you think. It’s a technique that relies more on precision than complex skills. For over ten years, my company, Omet Packaging, has been designing packaging for products of all shapes and sizes, from simple boxes to complex custom structures for global brands. We’ve learned that even the most difficult shapes can be wrapped beautifully with the right method. I’m going to walk you through the professional technique step-by-step so you can wrap any cylinder with confidence.
How Do You Measure the Wrapping Paper Correctly?
Cutting too much paper and creating a bulky mess? Or cutting too little and having to start over? Let’s get the measurements right the first time.
For the length, roll the cylinder one full rotation on the paper and add one inch for overlap. For the width, make sure the paper extends beyond each flat end by a little more than half the diameter of the circle.

This is the foundation of a clean wrap. Wasted paper is one thing, but an improperly measured piece makes the next steps impossible. In the packaging world, material optimization is key. We use advanced software, but you only need a ruler and this simple logic. The overlap on the length is for a clean seam. The extra paper on the ends is crucial for creating the neat folds later. If the top of your candle is 3 inches across (the diameter), you need the paper to extend past the top by at least 1.5 inches. This gives you enough material to work with to create the professional pleated look without it being too bulky or too sparse. Getting this right saves time and frustration.
Measurement Guide
| Step | Action | Why It’s Important |
|---|---|---|
| 1. Length | Place the cylinder on the paper. Roll it one full time to find the circumference1. Add 1-2 inches (2-5 cm) for overlap. | This ensures the paper covers the body completely with a small, clean overlap for the seam. |
| 2. Width | Stand the cylinder up. The paper’s width should be the cylinder’s height plus the radius2 of each end. | This provides the perfect amount of paper to create neat, flat folds on the top and bottom. |
What’s the Best Way to Create a Seamless Main Seam?
Is your tape visible and ruining the look? Do your seams look untidy and unprofessional? I will show you the trick for a truly invisible finish.
Roll the cylinder tightly in the paper. Before sealing, fold the final edge of the paper under by half an inch to create a clean, straight line. Then, secure it with double-sided tape placed underneath this fold for a hidden, professional seam.

This small step makes a huge difference. It’s the secret that separates amateur gift wrapping from a high-end, boutique-quality finish. At Omet Packaging, we create luxury boxes for cosmetics and jewelry where presentation is paramount. A visible, messy seam is simply not an option. The ‘folded edge’ trick ensures the final line is perfectly straight, not the fuzzy edge of cut paper. Using double-sided tape makes it look like the paper is magically holding itself together. First, place your cylinder on the paper and pull one side over, securing it to the cylinder with one small piece of regular tape. This just holds it in place while you work. Then, create the half-inch fold on the other edge, apply your double-sided tape, roll the cylinder tightly, and press the folded seam down. The result is flawless.
How Do You Neatly Fold the Ends of a Cylinder?
Are the top and bottom of your gift a bunched-up disaster? Does it look crushed and messy? The fan fold technique is the elegant solution you need.
Working on one end at a time, push the excess paper inwards from the edge toward the center. Create a series of small, crisp triangular pleats, pressing each one flat as you work your way around the circle. Secure the final fold in the middle with tape.

This is where the magic happens and where most people give up. But it’s a simple, repetitive process. Stand the cylinder on one end. Start at one point and push a small section of the paper down against the edge of the cylinder, creating a small, flat triangle. Press it down firmly. Move over about an inch and repeat the process, folding in the same direction. Continue this motion all the way around the circle. You are essentially creating a neat paper fan on the top of your gift. Each fold should be crisp and uniform. Our FSC-certified paper works great for this because it holds a crease well. When you get all the way around, the final section will tuck neatly under the first fold. A single piece of clear tape, or even better, a small sticker, is all you need to hold it all in place. It’s a method that looks complex but is surprisingly meditative to do.
Conclusion
Perfectly wrapping a cylinder isn’t hard. Just measure correctly, use double-sided tape for a clean seam, and finish with the neat pleating method for the ends.